- About Ramapo
- Academics
- Admissions & Aid
- Student Life
- Athletics
- Alumni
- Arts & Community
- Quick Links
- Apply
- Visit
- Give
GlobalProtect VPN
Installing the GlobalProtect VPN Client for Windows 10 (PDF)
Installing the GlobalProtect VPN Client for Mac OS (PDF)
Installing the GlobalProtect VPN Client for Windows 10
Installing the GlobalProtect VPN Client for Windows 10
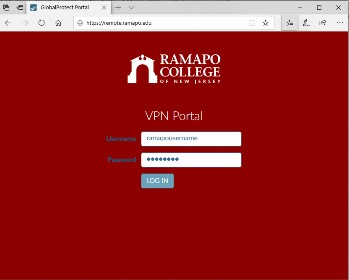
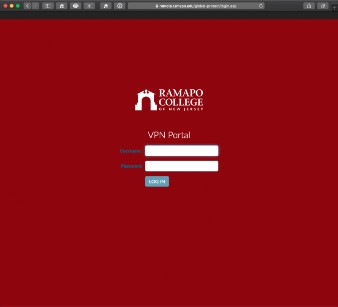
- Go to https://remote.ramapo.edu and login with your Ramapo username (without @ramapo.edu) and password.
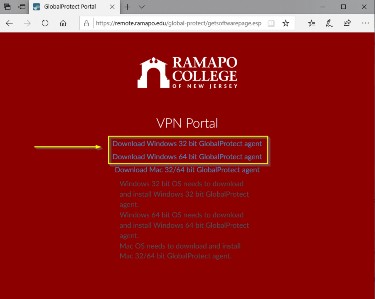
- Click the Download link pertaining to your System type of Windows you have installed. To determine the system type you have installed, please refer to Appendix A at the end of this document.
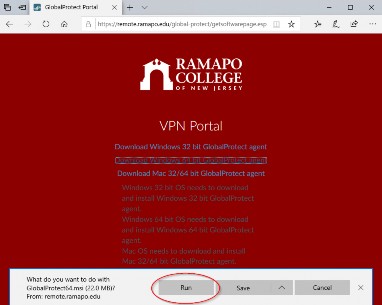
- When you click the Download link, you’ll be prompted to Run or Save the file. Click Run.
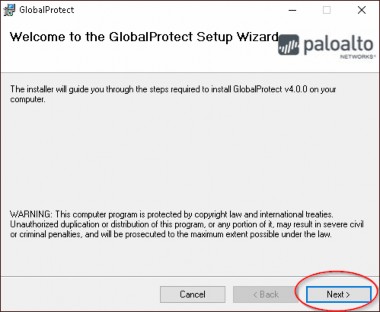
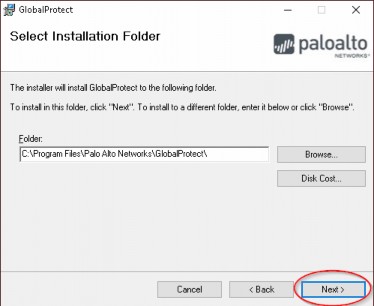
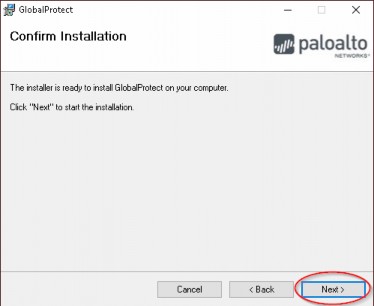
- The installation process will now start. Click Next throughout this process.
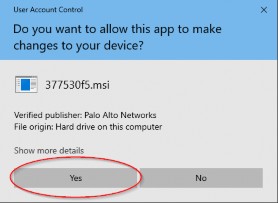
You may get a warning message as shown below, you can click Yes.
 Finally, click Close.
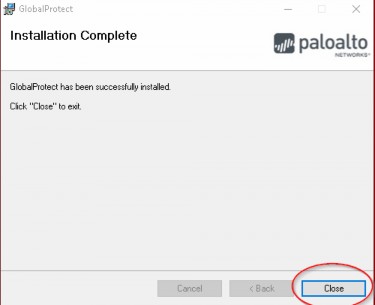
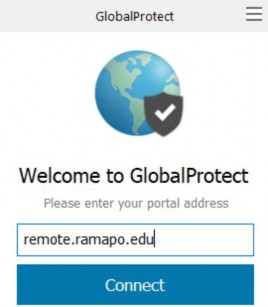
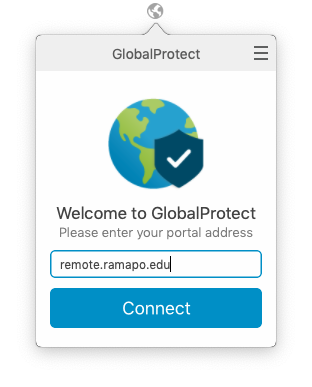
- The GlobalProtect VPN Client, should now open. In the portal field, type remote.ramapo.edu then clickConnect.
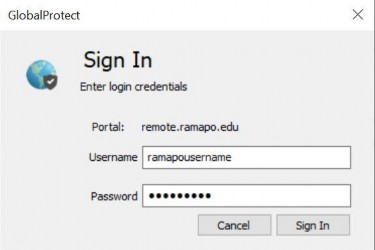
- Input your Ramapo username (without @ramapo.edu) and password then click Sign In.
- You should now be connected and presented with a successful message as shown below. You can close out of this.
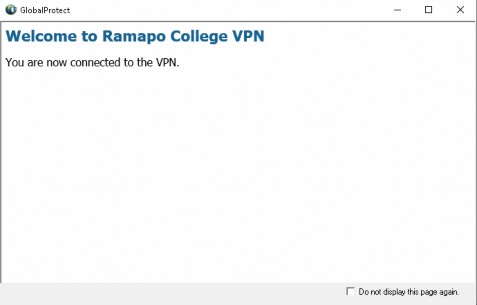
- You should also see Connected as your status in the GlobalProtect VPN Client.

- Congratulations you have successfully connected to the VPN!
Appendix A -Determine your System Type
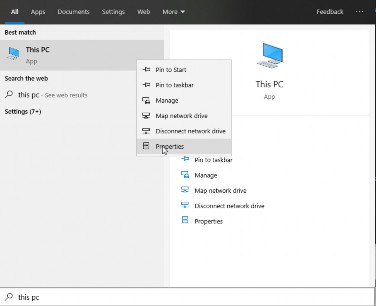
- From the Start menu, type This PC then right click on the icon and select Properties
- You should see your System type, by viewing the System type:

Installing the GlobalProtect VPN Client for Mac OS
Installing the GlobalProtect VPN Client for Mac OS
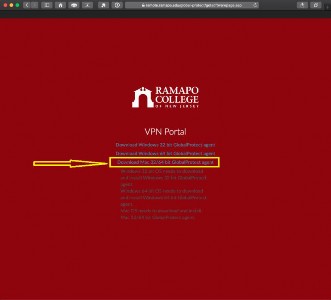
- Go to https://remote.ramapo.edu and login with your Ramapo username (without @ramapo.edu) and password.
- Click the Download link for the Mac.
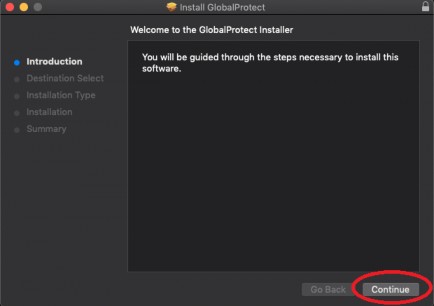
- When you click the Download link, it’ll be saved to your computer and you can access it by going to your dock. Click the GlobalProtect 5.pkg file to run it.

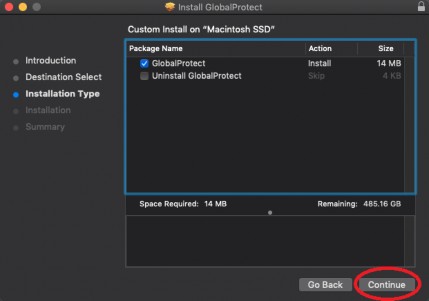
- The installation process will now start. Click Continue throughout this process.
 Finally, click Install.
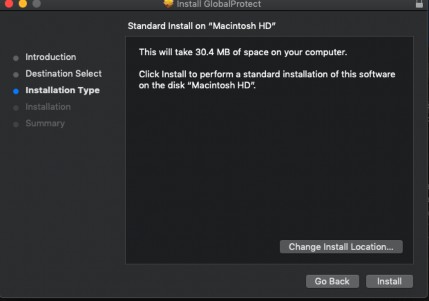
- Input your computer username and password for the installer to continue then click Install Software.

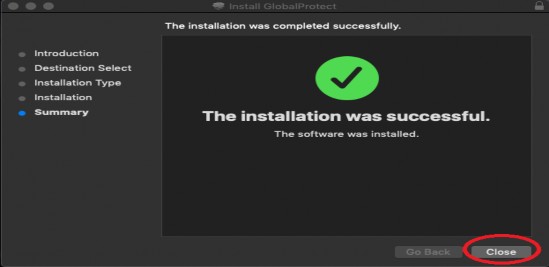
- Now, click Close.
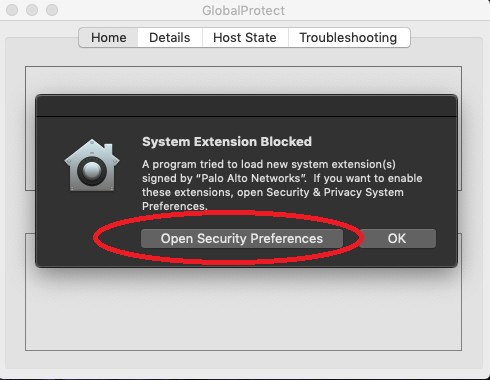
- The GlobalProtect VPN client will open and then you will be presented with the System Extension Blocked warning message, click Open Security Preferences.
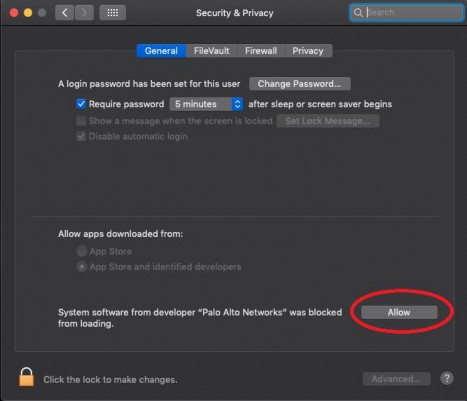
- Click Allow, then close the window.
- Reboot your computer.
- Now open the GlobalProtect VPN Client, and input remote.ramapo.edu in the portal field then click Connect.
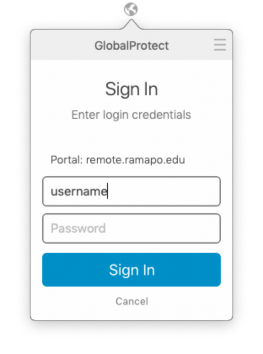
- Input your Ramapo username (without @ramapo.edu) and password then click Connect.
- You should now be connected and presented with a successful message as shown below. You can close out of this.
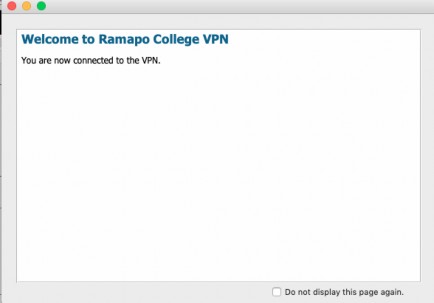
- You should also see Connected as your status in the GlobalProtect VPN Client.

- Congratulations you have successfully connected to the VPN!
505 Ramapo Valley Road
Mahwah, NJ 07430
p: 201-684-7500
e: information@ramapo.edu
Copyright ©2026 Ramapo College Of New Jersey | Statements And Policies | Accessibility | Contact Webmaster.