- About Ramapo
- Academics
- Admissions & Aid
- Student Life
- Athletics
- Alumni
- Arts & Community
- Quick Links
- Apply
- Visit
- Give
How-To Guides
How to Video Yourself with your SmartPhone
Hardware needed:
- Smartphone with 4k camera
- Table
- Tripod, Stack of books, or other stable items to prop the phone up
- Laptop, if you have one available (to help prop up the phone at a 90 degree angle)
Here is a 4 minute YouTube video with some tips about filming yourself:
https://www.youtube.com/watch?v=j685NaMDVYE
This tutorial uses a tripod to prop the smartphone up, but you can use a laptop or stack of books instead.
Finding the right interview area at home:
- Quiet area without any background noises (fans, HVAC systems, traffic, etc.)
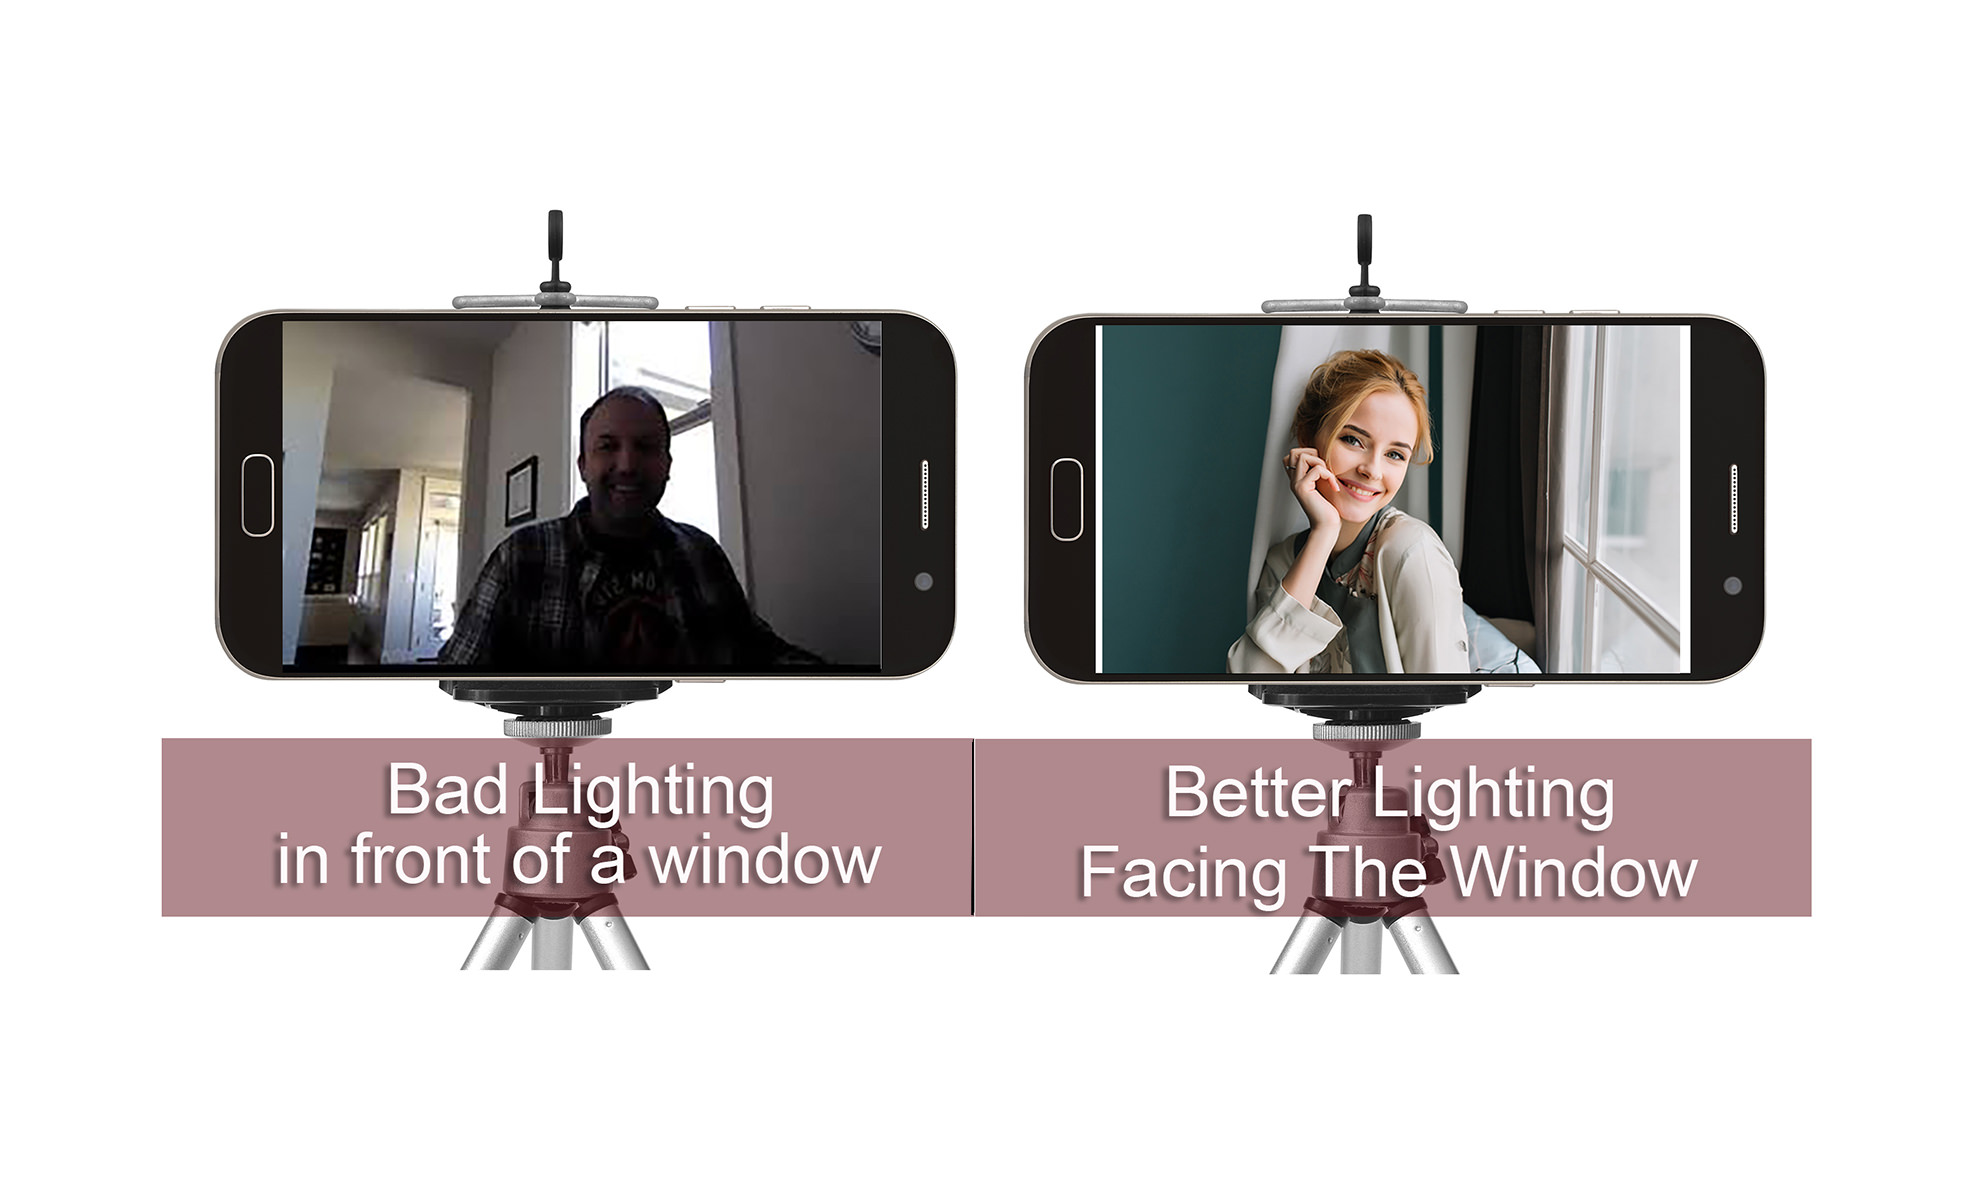
- Area with good lighting, preferably natural lighting with windows – light source should be IN FRONT of your face. If light is behind you, you will be backlit and your face will be in shadow.
- Area with a table and chair or someplace you can sit comfortably for some time.
Steps:
- Position yourself at a table with good lighting. You want to be FACING the light source. if windows are in the room, you want to be facing the windows, so the natural light hits your face.
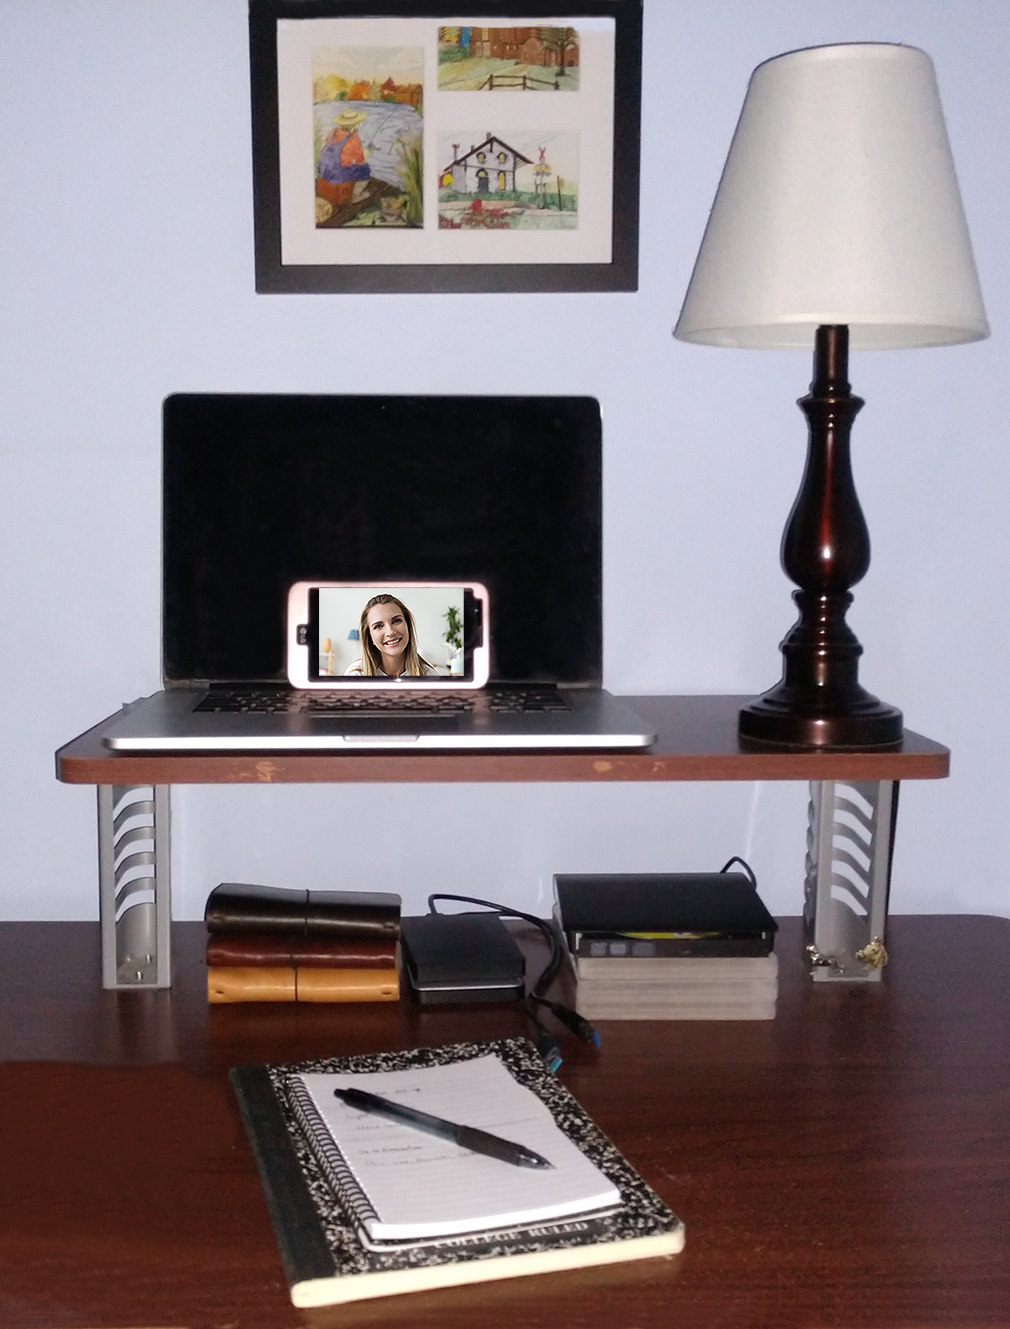
- Position your laptop on top of a stack of books so that the screen on the laptop is about eye level, when you are sitting about 3 feet away from the laptop.
- Turn the smartphone camera setting to 4k, under camera setting.
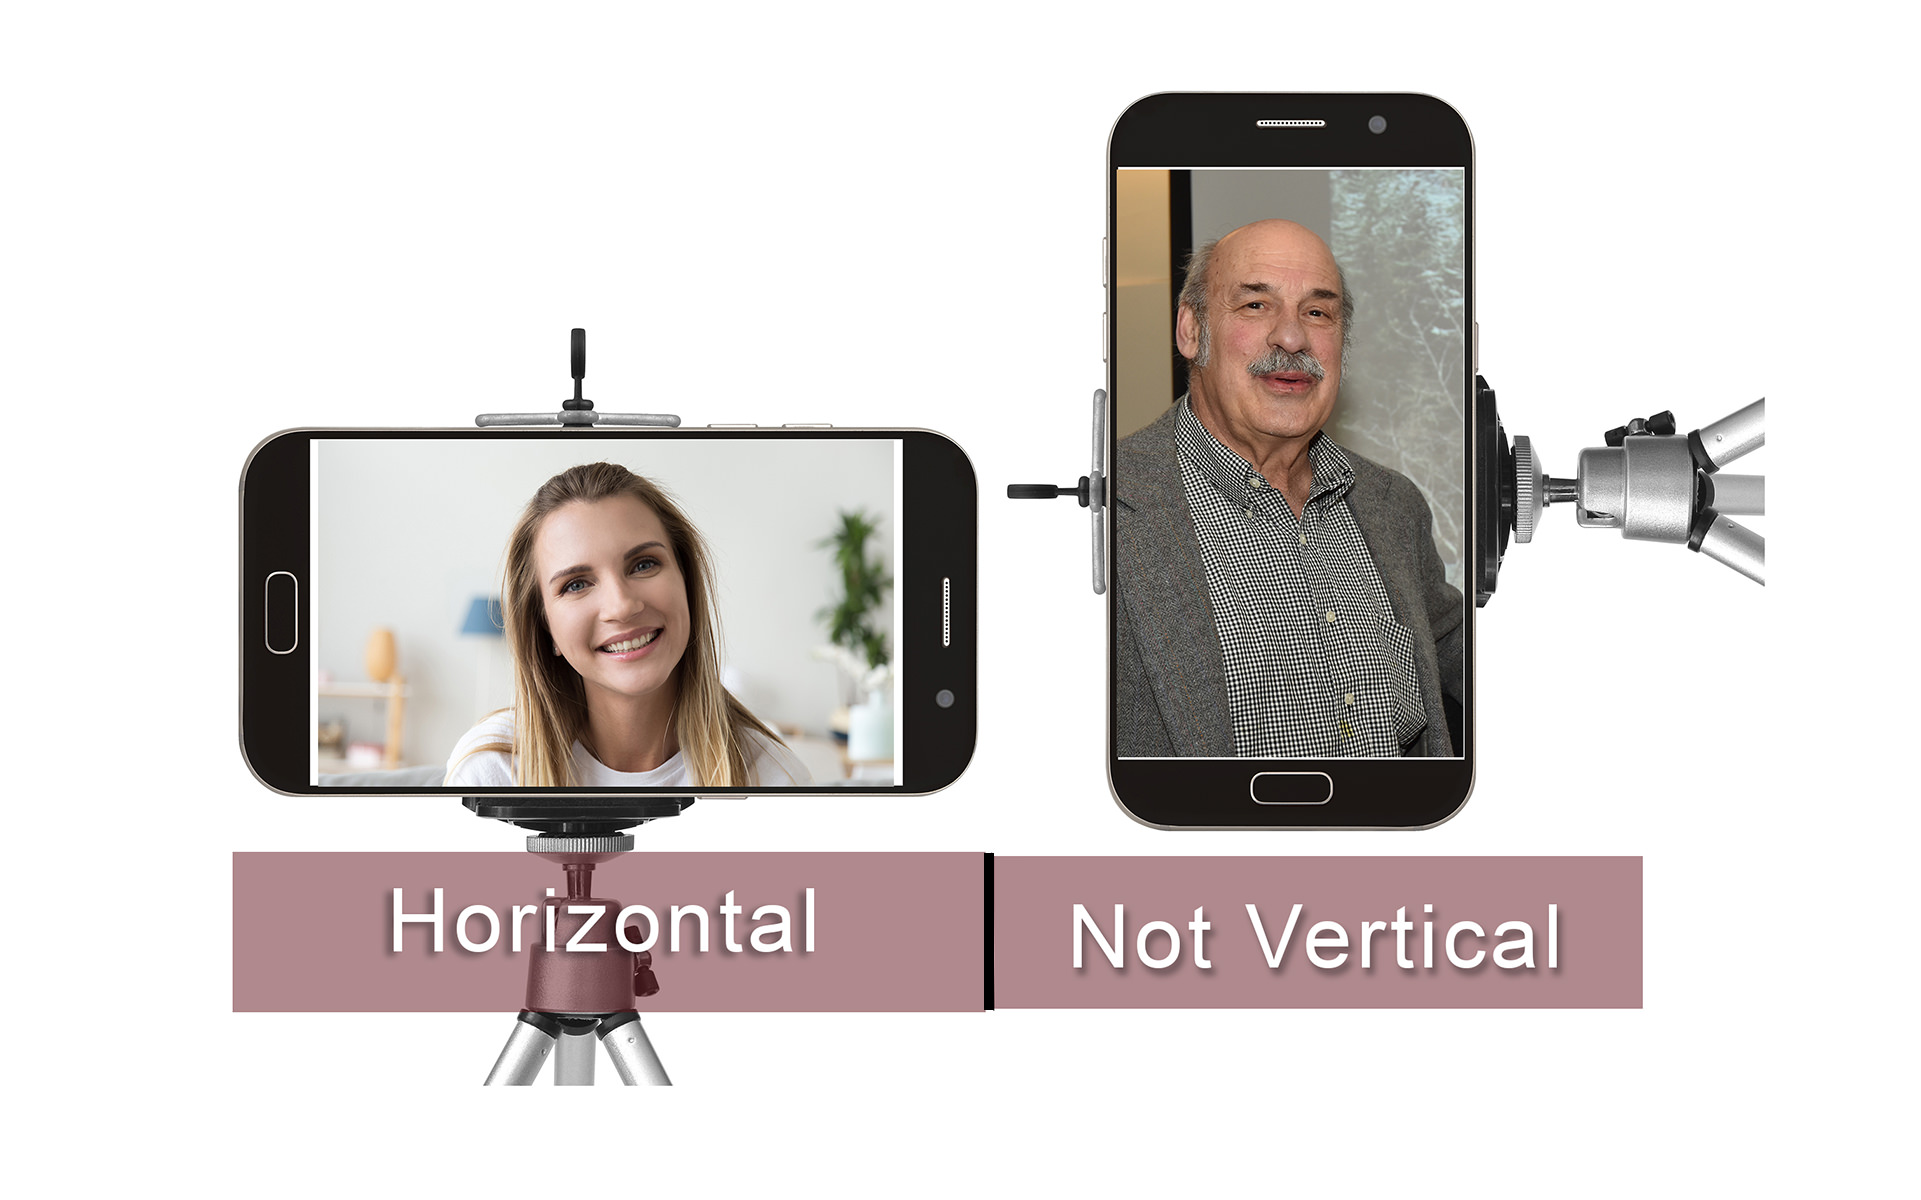
- Use the open laptop as a holder for the phone, resting the phone against the screen horizontally (long ways not vertical), the computer screen should be tilted at a 90 degree angle.
You can use books to move the laptop to a higher or lower position or use a stack of books without a laptop to position and secure the phone.
Positioning the frame of the camera:
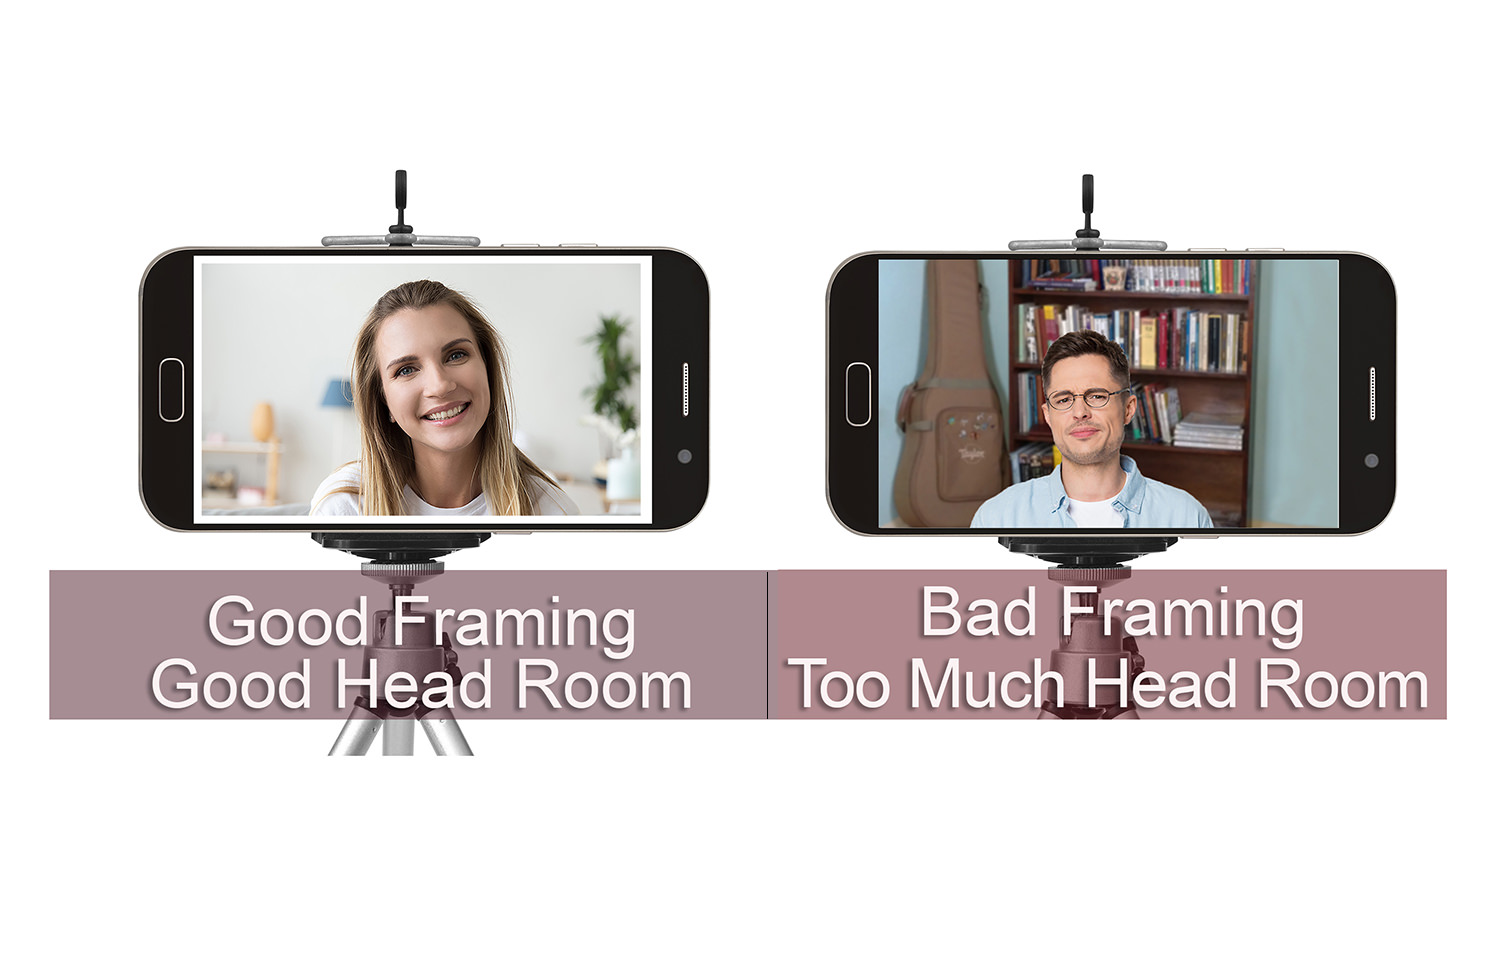
- The goal is to position yourself to be centered in the middle of the camera frame, showing from the stomach up, leaving some space above your head. Do not cut off the top of your head. To test the camera frame, first use the camera on the front of the phone, using “selfie mode” check the frame to make sure you are positioned correctly. Remember the phone should be resting horizontally not vertically.
- Then switch the camera to the lens on the backside of the phone, hit record and place the phone back to resting on the laptop. Make sure the camera on the phone is on the upper part of the phone not bottom, when resting horizontally.
- Record a 10 second test. Now check the 10 second test to make sure the video looks and sounds clear, with the right positioning.
- If everything looks good, start a new recording, now going into the actual interview. If you make any mistakes during your presentation just repeat any sections as needed, this can be cleaned up in post production.
Tips:
- Film your video horizontally (long ways not vertical)!
- Do not hold your phone with your hand like a selfie. Instead, be sure to securely prop the phone up aimed at you.
- Make sure your head and shoulders are in the frame. Do not cut off the top of your head or cut your body off too high.
- Be aware of lighting and sound. Film in a quiet place without noise or distractions. Make sure the light source is illuminating your face from the front and not casting shadows or “backlighting” you.
- Record yourself a few times saying the same thing. This will give the video editor options if needed. You can take a few practice videos until you feel comfortable. If you make any mistakes while recording, just keep going – first pause and then repeat the section you made the mistake on. The mistake can be edited out afterwards and by staying in the same position, it will help the edit be more seamless than if you were to stop and restart (and potentially move out of your previous position while doing so).
505 Ramapo Valley Road
Mahwah, NJ 07430
p: 201-684-7500
e: information@ramapo.edu
Copyright ©2026 Ramapo College Of New Jersey | Statements And Policies | Accessibility | Contact Webmaster.
Follow Ramapo